Back to Settings
Geofences are virtual boundaries created on your account to keep track of vehicle movements in defined areas. There are two main ways a Geofence can be used: as a region or territory to be alerted when your drivers leave the defined area, or to mark an individual locations that your drivers frequent regularly. You can set up the geofence alert to be alerted when your drivers enter and exit geofences.
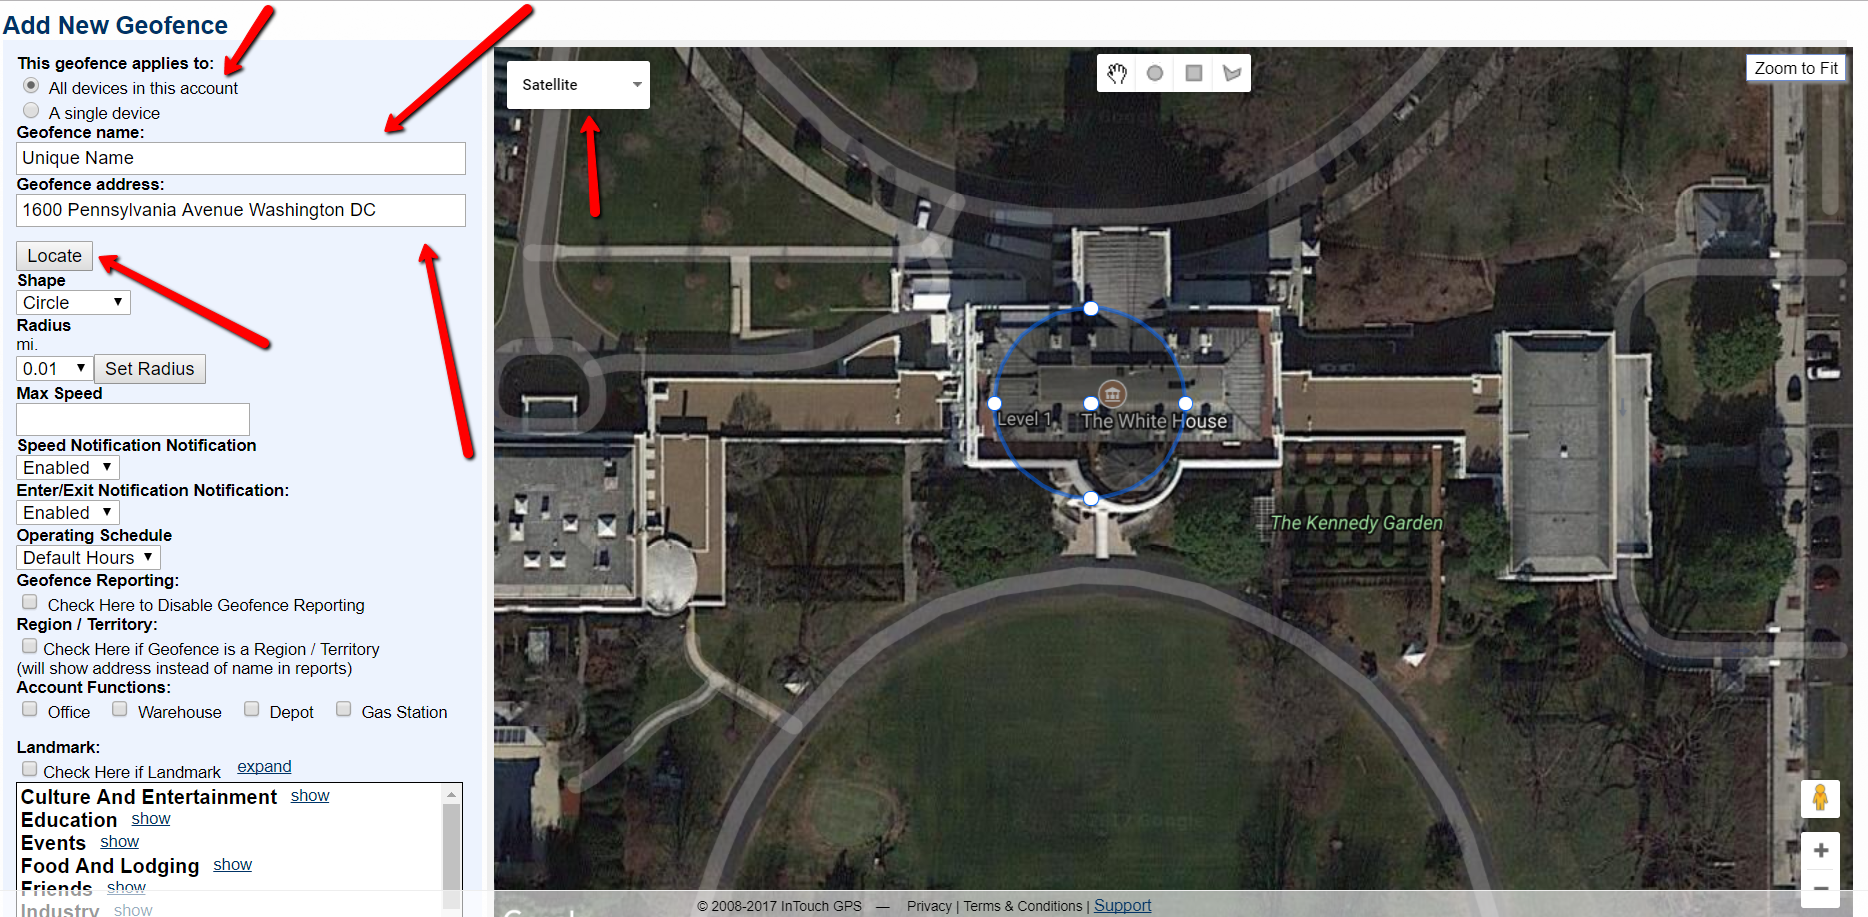
Creating a Geofence for an individual location
To create a Geofence, go to the Settings tab and select Geofences from the sub-menu and click on “New Geofence” on the right hand side. Give the Geofence a unique name to identify the specific area and enter the location address and click “locate” to locate the address on the map. Next click the the dropdown box in the upper left corner of the map and select satellite view to see the outline of the area. You can then adjust the shape to cover all of the parking area for that location. You can either drag on the circle’s edge to make the radius larger, or you can select one of the other shape options from the toolbar at the top of the map. Once set, click the “create geofence” button at the bottom of the screen. Geofences should have unique names and should not overlap, allowing them to be clearly identified.
Creating a Geofence as a Region/Territory
To create a Geofence as a Region or Territory, go to the Settings tab and select Geofences from the sub-menu and click on “New Geofence” on the right hand side. You can create the Geofence area as large as you need, but you must type in a starting address to position the map. It can be as generic as just a city name and state for a large territory/region or you can use a full street address. Zoom out as necessary to set the shape. You can either use the Radius dropdown box on the left to change the size of the circle, grab the edge of the circle and click and drag to the desired size, or use the last option on the toolbar at the top of the map to create a custom shape by clicking the connecting the dots.

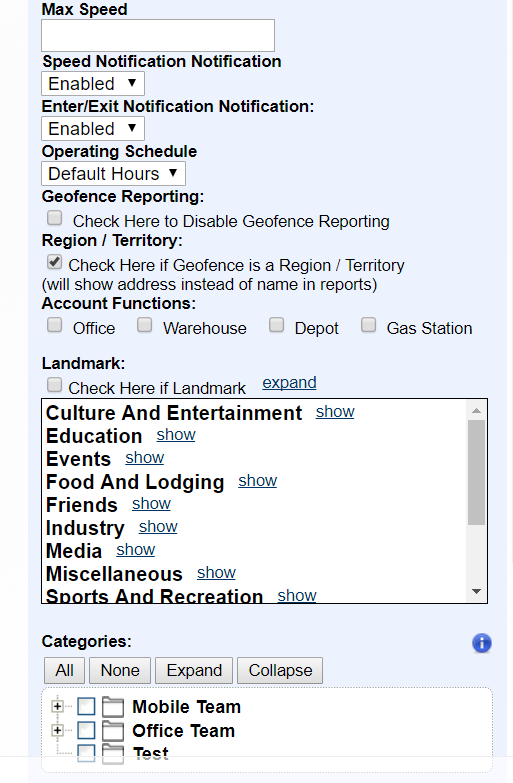
***YOU MUST CLICK THE “REGION/TERRITORY” CHECKBOX ON THE LEFT FOR THE SYSTEM TO REPORT THE INDIVIDUAL STREET ADDRESSES WITHIN THE TERRITORY***
Geofence Options
Geofence Alert – alerts when drivers enter and exit the Geofence
Geofence Speeding Alert – you can set a specific speed limit for a geofence by entering the limit in the Max Speed field and turning on the Geofence Speeding alert in the Alerts section
Operating Schedule – you can set a schedule for when you want the Geofence alerts to be sent. You can create the schedule in the “Schedules” link under Settings as one the Geofence schedule options (in Type dropdown box). Then when setting up the Geofence, select that schedule from the Operating Schedule dropdown box.
Landmarks – you can add a landmark (map marker) to identify the Geofence location on the map. Check the “Check Here if Landmark” checkbox and select a picture from the categories below. Landmarks can be color-coded if needed.
Geofence Report
A special report titled “Geofence Events” is available in the Reports suite that lists each time a vehicle enters and exits Geofences and lists the duration of time spent in each. You can filter the report to show all Geofences on the account, or isolate an individual Geofence.
Mass Creation of Geofences
A list of geofences can be uploaded for you, if you have a large number to input. This list must be submitted in a specifically formatted CSV file, for which we can send you a template. All geofences uploaded in this manner will in the shape of a circle, however you can determine the radius to use. It is the responsibility of the client to check the position of each geofence after upload and adjust boundaries as needed for maximum effectiveness.