Back to Settings
Categories allows you to organize your fleet and set specific user access. It works like a filing system, in which you can create multiple layers to further sub-divide your fleet. There are no limitations to Categories; you can add and sub-divide them as much as needed. You can also assign devices to multiple Categories.
Creating Categories
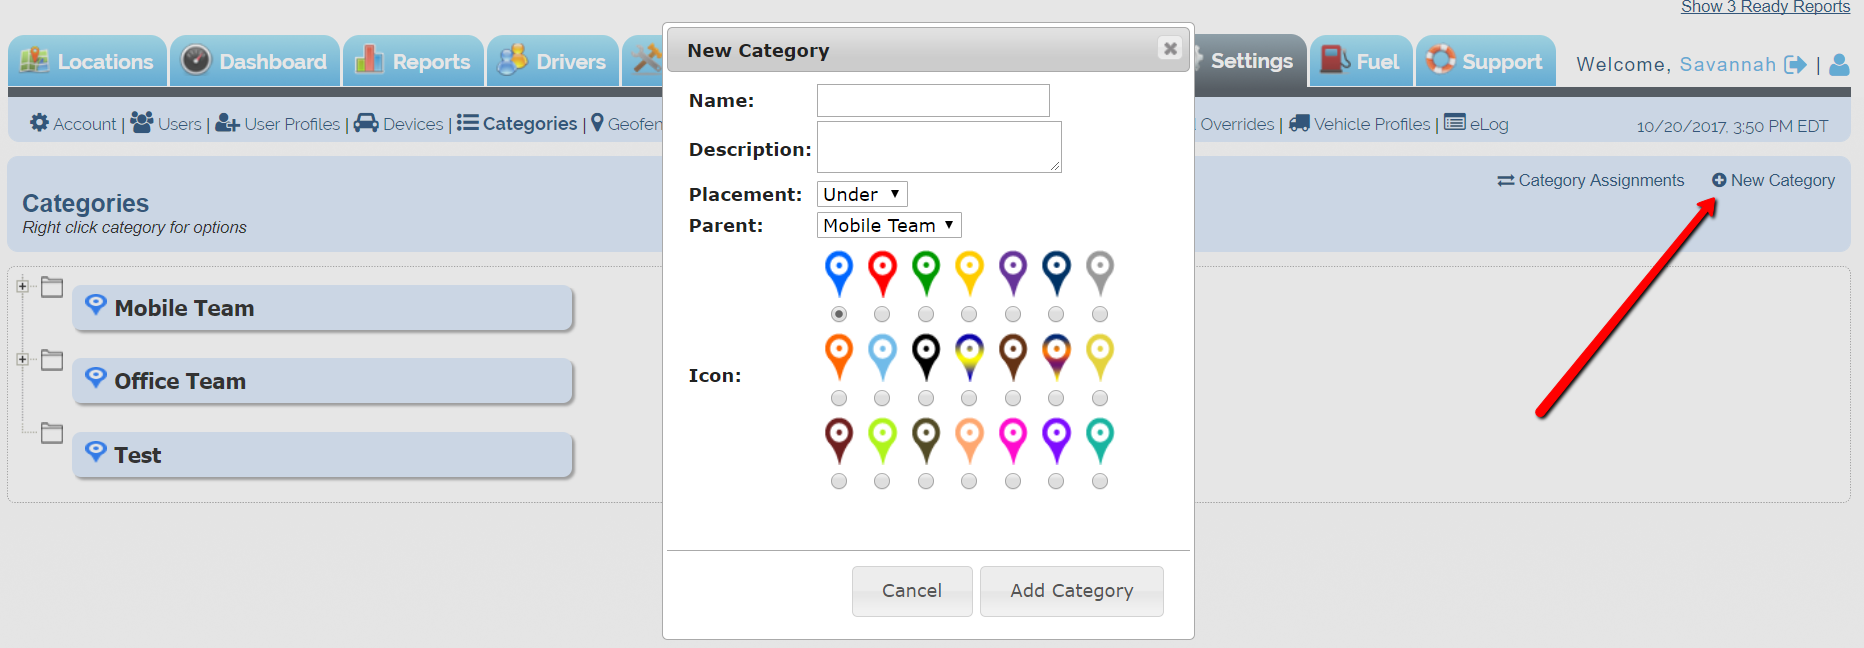
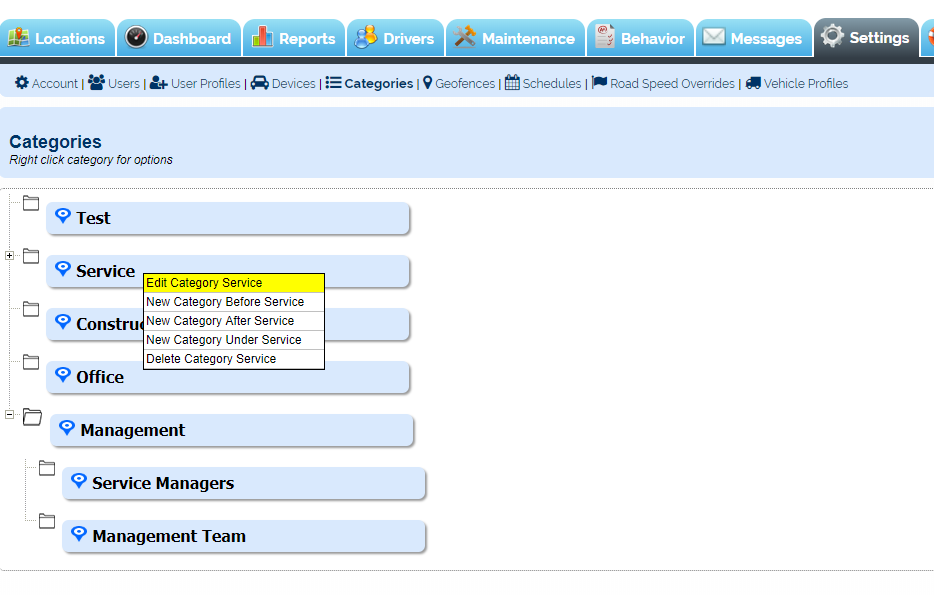
Click on “New Category” to the far right, type in a name and click on “Add Category.” There is a 30 character limit for Category names. You can also further sub-divide this into additional Categories by right clicking on the folder icon to the left of the Category and selecting the “New Category Under” option and organize the order and placement of additional categories using the “Before” and “After” options. There are no limitations to Categories. You can add and sub-divide them as much as needed.
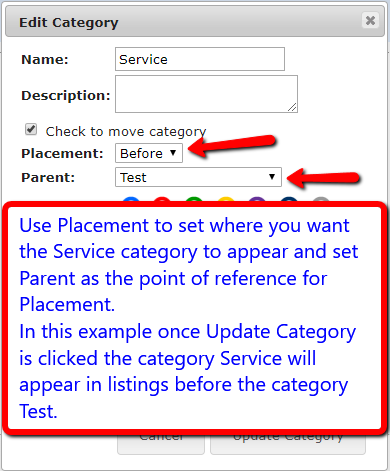
To arrange the order that categories appear you edit the categories on the Settings tab > Categories page by right clicking on the category you want to change the order of then setting its Placement.
Assigning Devices
Now that you’ve created your Categories, the next step is to assign the devices. Click on “Category Assignments” and a list of your devices will appear on the left. First, expand your list of Categories at the top of the screen and select the Category you wish to assign devices to. Next click on the device on the left you wish to assign, and it will move from the “Available” section on the left to the “Assigned” section on the right. You can also use the “Search” option at the top to search for a specific device to assign, or use the “Move all” button to assign all devices visible on the left.
