Back to Hardware
Back to Add-On Options
Back to Platform Overview
Introduction:
The Dispatch Suite is an add-on package that is designed to interact with your In-Vehicle Garmin to effectively create quick routing, dispatch, and two-way messaging for fleet management. Create the best routes each day for your vehicle deliveries all from your tracking application with the routes being added straight to your vehicle’s Garmin!
How do I know if my Garmin is compatible to be linked with the Tracking Device?
Your Garmin must be FMI-capable. Here is a link to compatible Garmins:
For your Garmin to work with our system, you must purchase our FMI-Cable, giving power to your Garmin and linking it to the tracking device.
Using the Dispatch Suite on your Tracking Application:
There are 6 sub-menu tabs on your Dispatch Suite, here is how you can use these to manage your fleet:
1. Jobs Board: See historical jobs or create new ones from this sub-menu. Jobs are like deliveries to be made to a client location. You set a date and time based on a client location for when a delivery needs to be made. Note, these jobs are not assigned to any vehicle in particular yet. You will do this with the Assignments or Jobs Optimization sub-menu.

2. Quick Jobs: A faster way to send a Job to a specific Garmin, including only an address and a custom message.
3. Assignments: Now that you have created Jobs, you must assign these to vehicles. On the Assignments sub-menu, you simply schedule Jobs from your list onto the vehicles that need to make the deliveries. Once Jobs are assigned to the correct vehicles, you can have the system sort the route automatically or you can make manual changes.
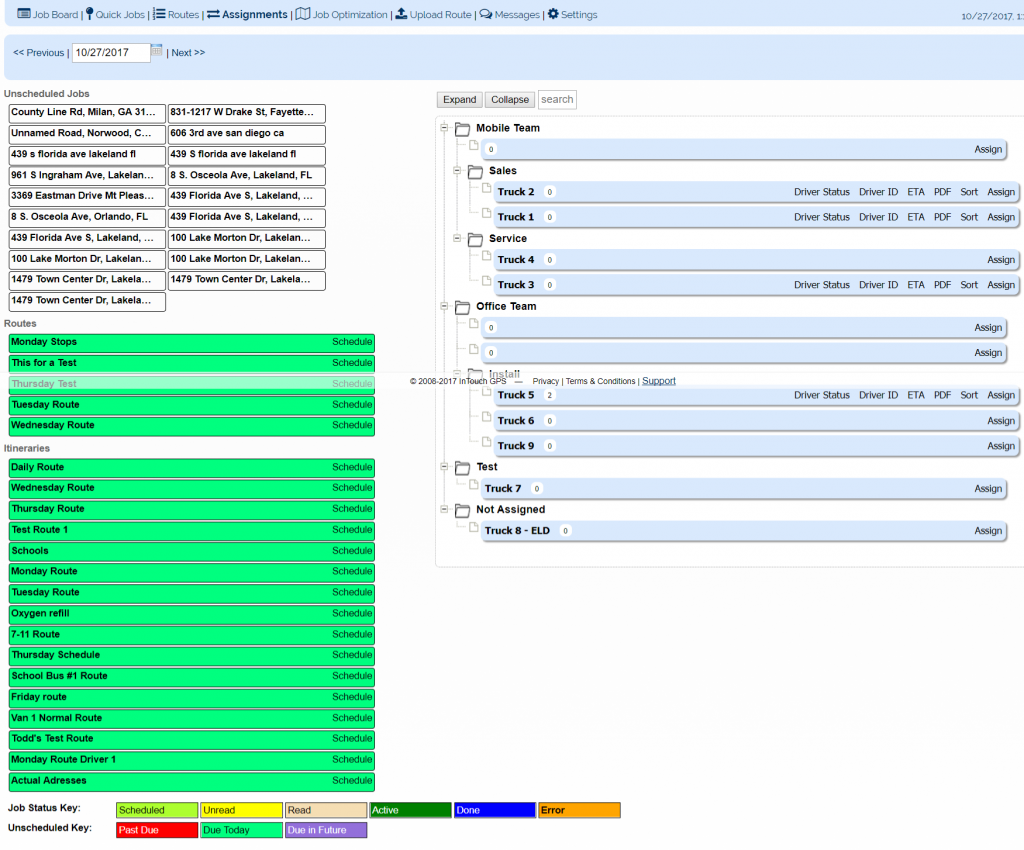
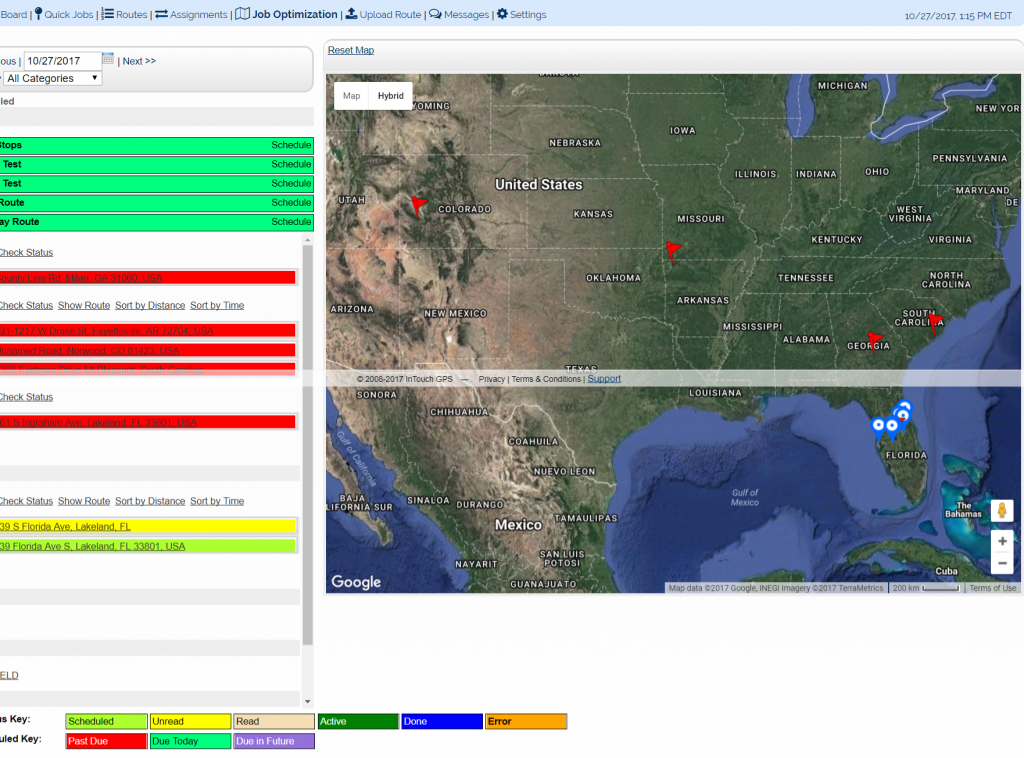
4. Jobs Optimization:This will show you on a map each scheduled Job. As your vehicles reach their destinations, the Job will be marked automatically as completed. You can also assign and organize your Jobs on this screen.
5. Messages: This is the two-way communication sub-menu to send messages straight to the In-Vehicle Garmin’s display; safely and quickly communicating with your Drivers! This includes options for pre-made “Quick Messages” and “Responses” for easy interaction.

6. Settings: Fine tune your Dispatching experience by customizing your Itineraries, Garmin display, Forms, Job display, and Messages.

Routes
You can now set up Routes within the Dispatching Tool. This has been designed to streamline the process of getting Jobs into the system and out to your drivers.
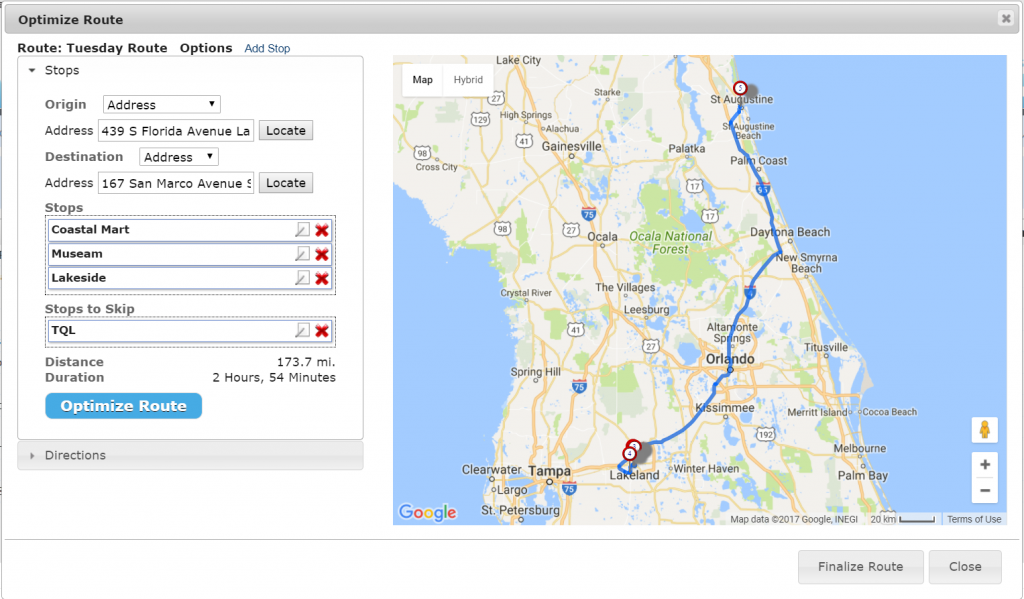
Go to Dispatch>Routes>Add Route
Next, name your route, then select Vehicle the route will be assigned to and the date the route should be scheduled for.
When you select Save, a new pop-up window will appear from which you’ll enter the individual Jobs for the Route. Use the Add Stop, see on the left hand side of the pop-up window, at the top.
Another pop up window will appear allowing you to input the Job Type, Address, Name, the Promised Time, any notes and an option to skip the stop (to be used if needed, ie a client cancels one of their routine appointments). Select Save, then continue entering the rest of the jobs. Next the Add Job link, you see the Options link which allows you to indicate if you would prefer to route around highways or toll roads.
When you are done entering jobs, you put in your Route options. You can select the Origin of the route (a certain address, job, geofence or the Garmin location) along with the Destination. This allows you to control where you want to the Route to begin and end. You can rearrange the jobs as needed by dragging and dropping. You can also indicate any stops to be skipped. Selecting Optimize will then lay the Jobs out in the most efficient way possible, taking into account your designated Origin and Destination. Select Finalize to finish.