Back to ELD Driver App
Data Transfer
This will show the dialog displaying the supported data transfer options. The ELD provides a standardized single-step compilation for the driver’s ELD records and initiation of the data transfer to authorized safety officials when requested during a roadside inspection.
The following are the different ways to access the Data Transfer dialog
- Main Navigation Menu
- Swipe in from the left edge of the screen, or tap the
 Main Navigation Hamburger icon to show the main navigation menu.
 - Tap the Roadside Inspection option in the Main Navigation Drawer, after which the roadside inspection screen will then be displayed.
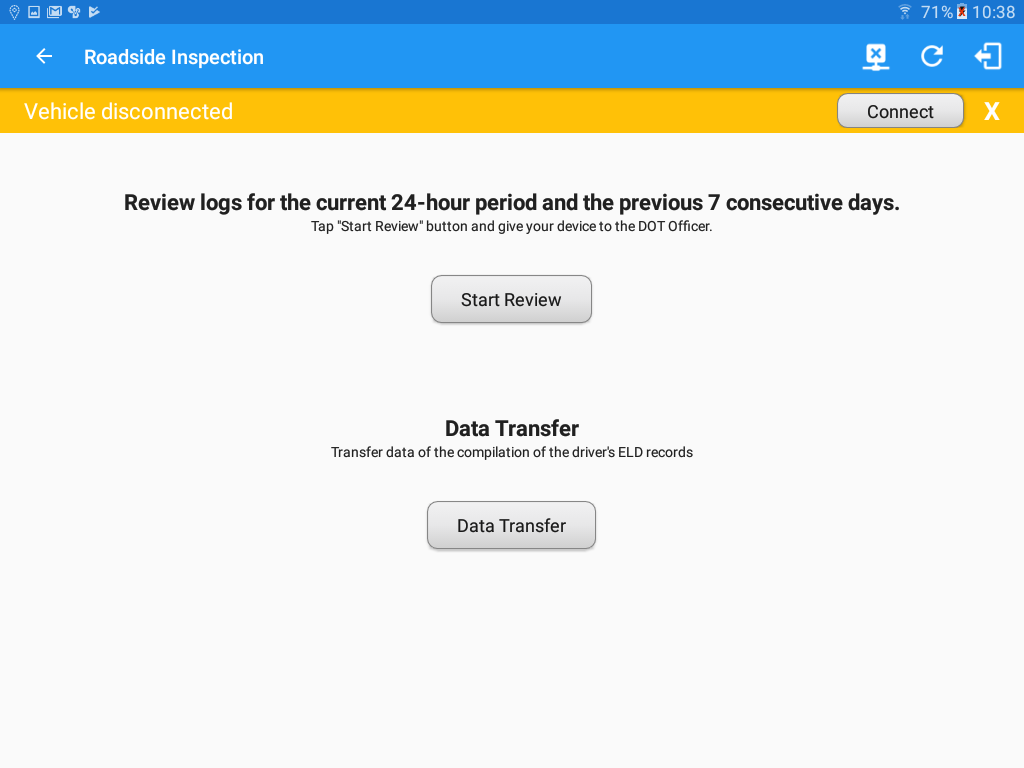
- Tap the
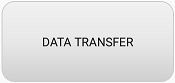
 Data Transfer button.
- Swipe in from the left edge of the screen, or tap the
- Driver Options
- Go to the HOS Main Dashboard.
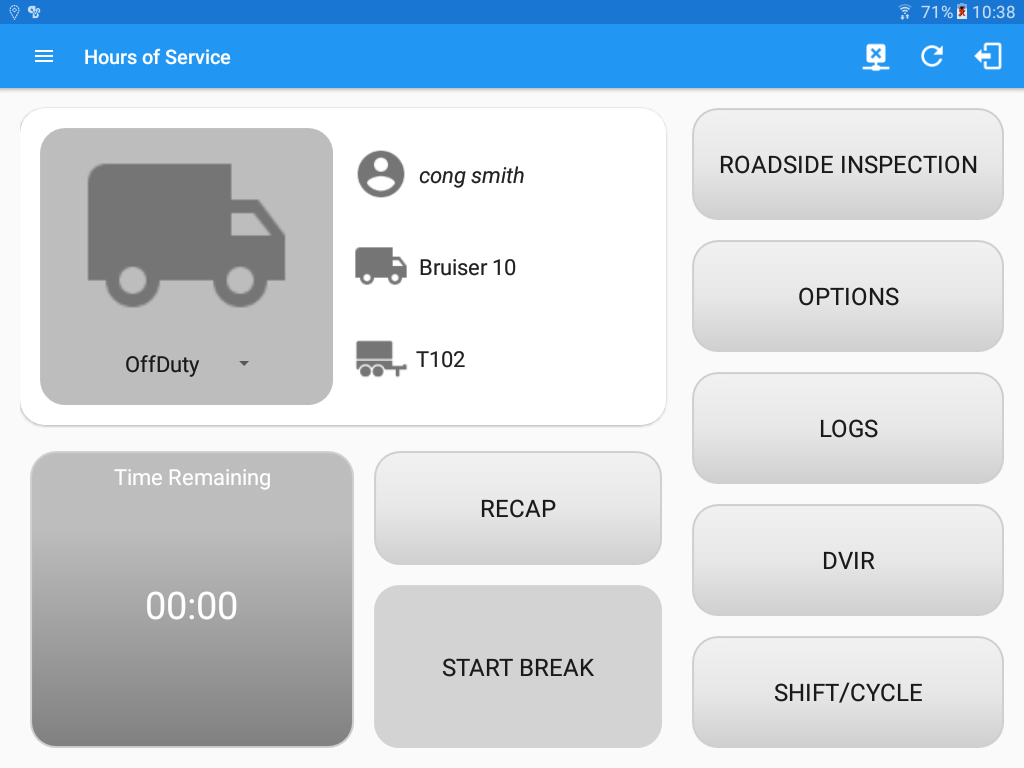
- Tap the Options button.

- Tap the Data Transfer button.
- Go to the HOS Main Dashboard.
Transferring Data
- Once the Data Transfer button is tapped, a selection of the supported data transfer options by the ELD will prompt to the user.
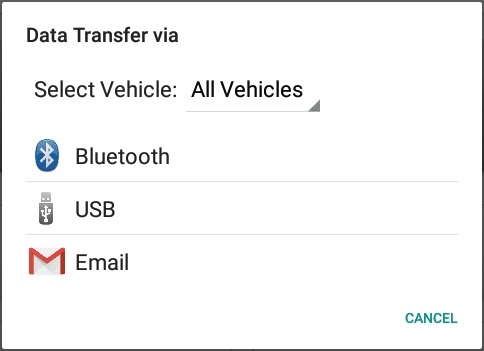
- Select Vehicle – this option enables the ELD to produce a data file or a series of data files of ELD records for a subset of its vehicles used by the driver. Tap on the menu to show the list of vehicles then select.
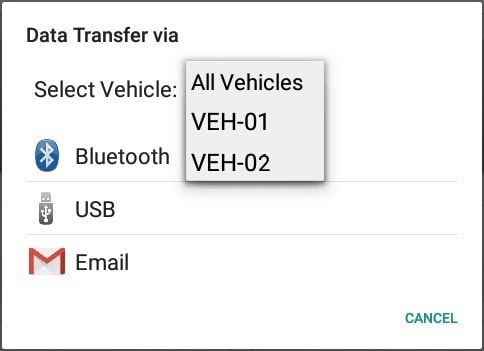 Note: ‘All Vehicles’ option will only display on the list when the driver has already driven multiple vehicles for the day.
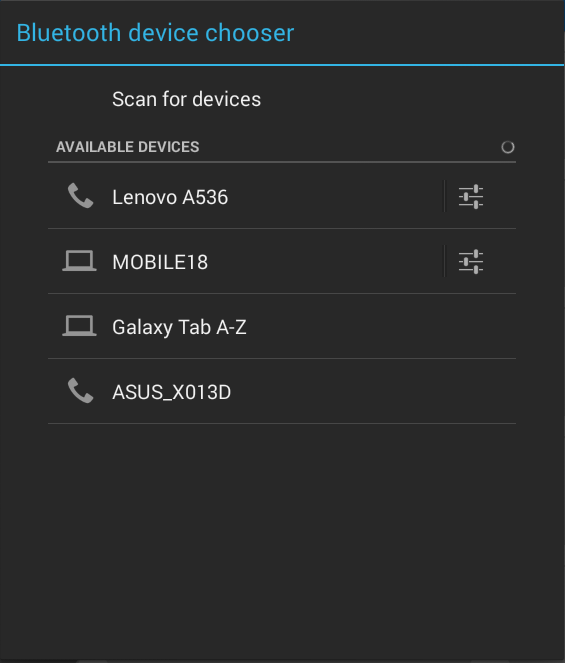
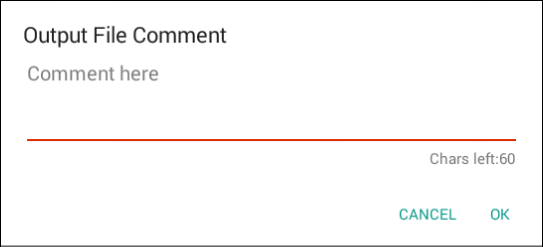
- Transfer via Bluetooth – this option enables the user to transfer files through Bluetooth. The ELD prompts the output file comment in which the driver may or may not input as specified in section 4.3.2.5. After the input, if Bluetooth is not yet turned on, a prompt will appear asking you to turn it on.
 You will then be asked to pick the device to which the data will be transferred via Bluetooth.
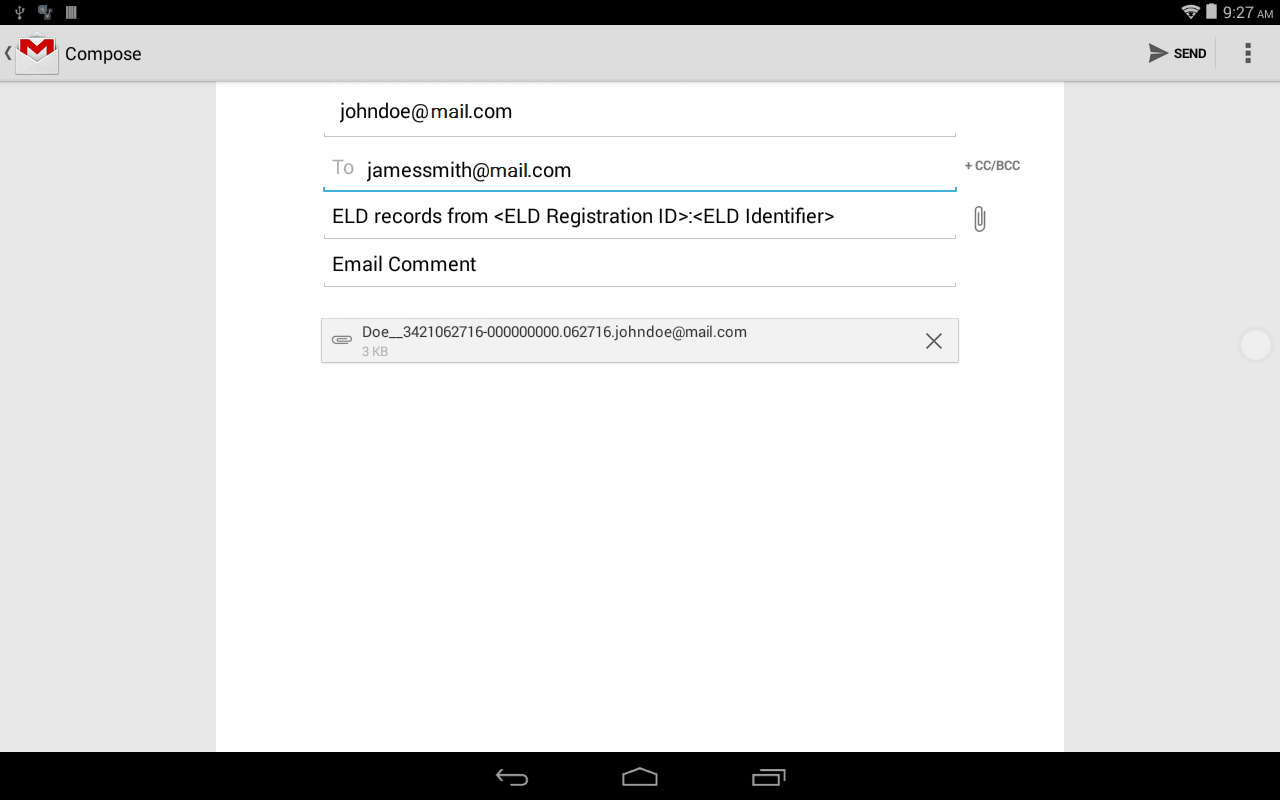
- Transfer via Email – this option enables the user to transfer files through email. The ELD output file transferred is encrypted using AES-256 in FIPS Publication 197. Before sending, the ELD prompts the output file comment in which the driver may or may not input as specified in section 4.3.2.5.
 The device’s default email application will then be opened before sending the email to which the data will be transferred.
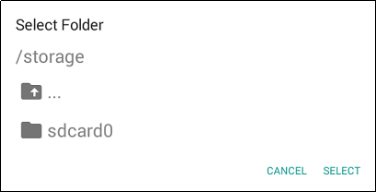
- Transfer via USB – this option enabled the user to transfer files through USB (external devices). However, prior to saving the driver’s ELD file to an external storage/device, the ELD re-authenticates the driver account by asking for its password.
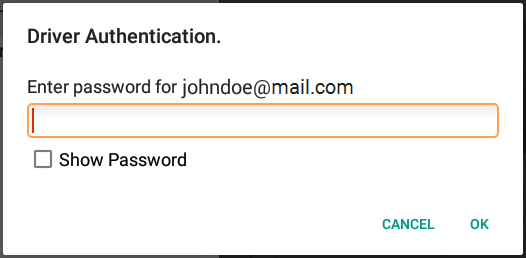 If the authentication process is successful, the driver can now select on where to save the ELD file.
- Transfer via Bluetooth – this option enables the user to transfer files through Bluetooth. The ELD prompts the output file comment in which the driver may or may not input as specified in section 4.3.2.5. After the input, if Bluetooth is not yet turned on, a prompt will appear asking you to turn it on.
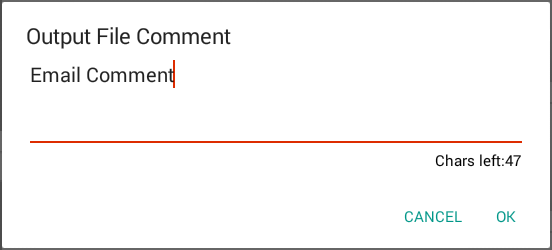
- Output File Comment – After selecting a data transfer option, the ELD prompts the output file comment in which the driver may or may not input as specified in section 4.3.2.5. The ELD accommodates the entry of an output file comment up to 60 characters long
 Upon confirmation, the ELD generates the compliant output file and performs the data transfer.
Emails not Arriving – Settings for Success
If your emailed logs are not arriving to the inbox of the user, ensure that the phone or tablet that you are using has an active Internet connection. This applies to the receiving party as well as they will need an Internet connection for the email to arrive into their inbox.
Once sent, the user may need to check their email’s Spam folder if it did not arrive to their primary inbox within one minute. If it still does not arrive, then you will need to review the settings on your InTouch ELD app to ensure they are set to send this successfully.
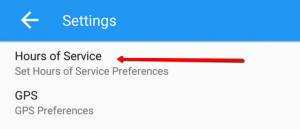
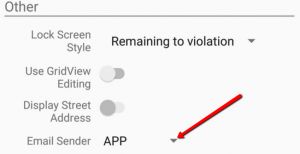
Below are three steps for setting the email sender to “App”
Go to Settings
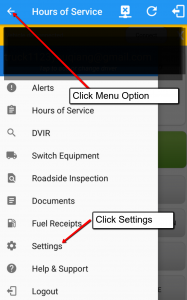
Click on the Hours of Service option under Settings
Scroll down and select App as the email sender option
In-order to email your logs, you must have an app on your phone or tablet that is signed-in and connected to a functioning email. This can be the Gmail app or a generic Email app.
Below is how to setup your email on a generic email app
- Start by adding your Email Account by opening the Email app and entering your existing email address into it.
- Next, select the type of email account you will be using.
- POP3 will download the emails from the server and store them on your phone.
- IMAP will store the emails on the server and show a cached copy on your phone. IMAP is best in most cases.
- Exchange is not supported because it requires a Microsoft Exchange server
- Select your Server Settings
-
Incoming Server Settings
- Username: Enter your full email address
- Password: Enter the password for your email account
- Server: This is your domain name preceded by “mail.” like mail.example.com.
- Port and Security Type:
- If you’re using POP, choose either:
- Secure – Port: 995 and Security Type: SSL/TLS (Accept all certificates)
- Insecure – Port: 110 and Security Type: None
- If you’re using IMAP, choose either:
- Secure – Port: 993 and Security Type: SSL/TLS (Accept all certificates)
- Insecure – Port: 143 and Security Type: None (Accept all certificates)
- If you’re using POP, choose either:
- Once the settings are entered, tap Next.
-
Outgoing Server Settings
- Select Require Sign-In.
- Username: Enter your full email address
- Password: Enter the password for your email account
- Server: This is your domain name preceded by “mail.” like mail.example.com.
- For SMTP Port and Security Type, choose either:
- Secure – Port: 465 and Security Type: SSL/TLS (Accept all certificates)
- Insecure – Port: 26 and Security Type: None (Accept all certificates)
- Once the settings are entered, tap Next.
-
- Enter the password for your email address.